Ready to discuss your project ? Call us now on: 06.65.91.05.76

CALL US ON: 06.65.91.05.76

Home > Refurbishment Of A Bedroom And En Suite

Refurbishment of a bedroom and en suite

The interior design process of a bedroom and en suite explained

By Abigail BARNES (Interior Architect @ Maison Bretagne Interiors)

The initial interior design brief 

The main object of the brief from the client for this renovation of ‘The Blue Room’, was to inject glamor into a bedroom and en suite bathroom. The decor in the room was looking tired and needed some attention. I identified during the onsite visit that the bathroom configuration and separate toilet cubicle was a poor use of space. It was also dimly lit and claustrophobic. The first thing I suggested was to relocate the whole en suite to the adjacent wall and allow daylight into the space. I proposed to integrate a new shower and WC into the new space and add a small dividing half height wall for privacy.

The main object of the brief from the client, was to inject glamor into a bedroom and en suite bathroom. The decor in the room was looking tired and needed some attention. I identified during the onsite visit that the bathroom configuration and separate toilet cubicle was a poor use of space. It was also dimly lit and claustrophobic. The first thing I suggested was to relocate the whole en suite to the adjacent wall and allow daylight into the space. I proposed to integrate a new shower and WC into the new space and add a small dividing half height wall for privacy.

As an interior architect, I believe a large part of my job is to identify the most practical use of a space. No matter how small, the aim is to really think about how a person or people will exist within it. I begin considering the clients needs and whether or not the flow of the space makes sense.

The next stage is to understand the unique style of a client, which can take time and much discussion. Our mission is to discover what is important to them and then try and deliver a well thought out project. Once we have this criteria to hand the preparatory works can begin.


Below is a photo of  ‘The Blue Room’ before works. The en-suite was in an unsuitable position with the WC cubicle as a separate small room next to it, neither had a window or correct ventilation for that matter, therefore both spaces were very dark and uninviting.

Starting the decoration process by picking out the paint colours, the colours picked was blue.

Creating a plan

My first priority was to accurately measure the existing bedroom, adjoining bathroom and toilet . I then returned to the office and start designing the layout. Working on «Sketch-Up» I began to reconfigure the space as perceived onsite. The client had told me that this room would be rented out to guests of their bed and breakfast. From this I knew the space had to be both functional and comfortable to relax in. A clear idea of their interior specifications, made things easier when sourcing tile and paint colours for finishing touches.

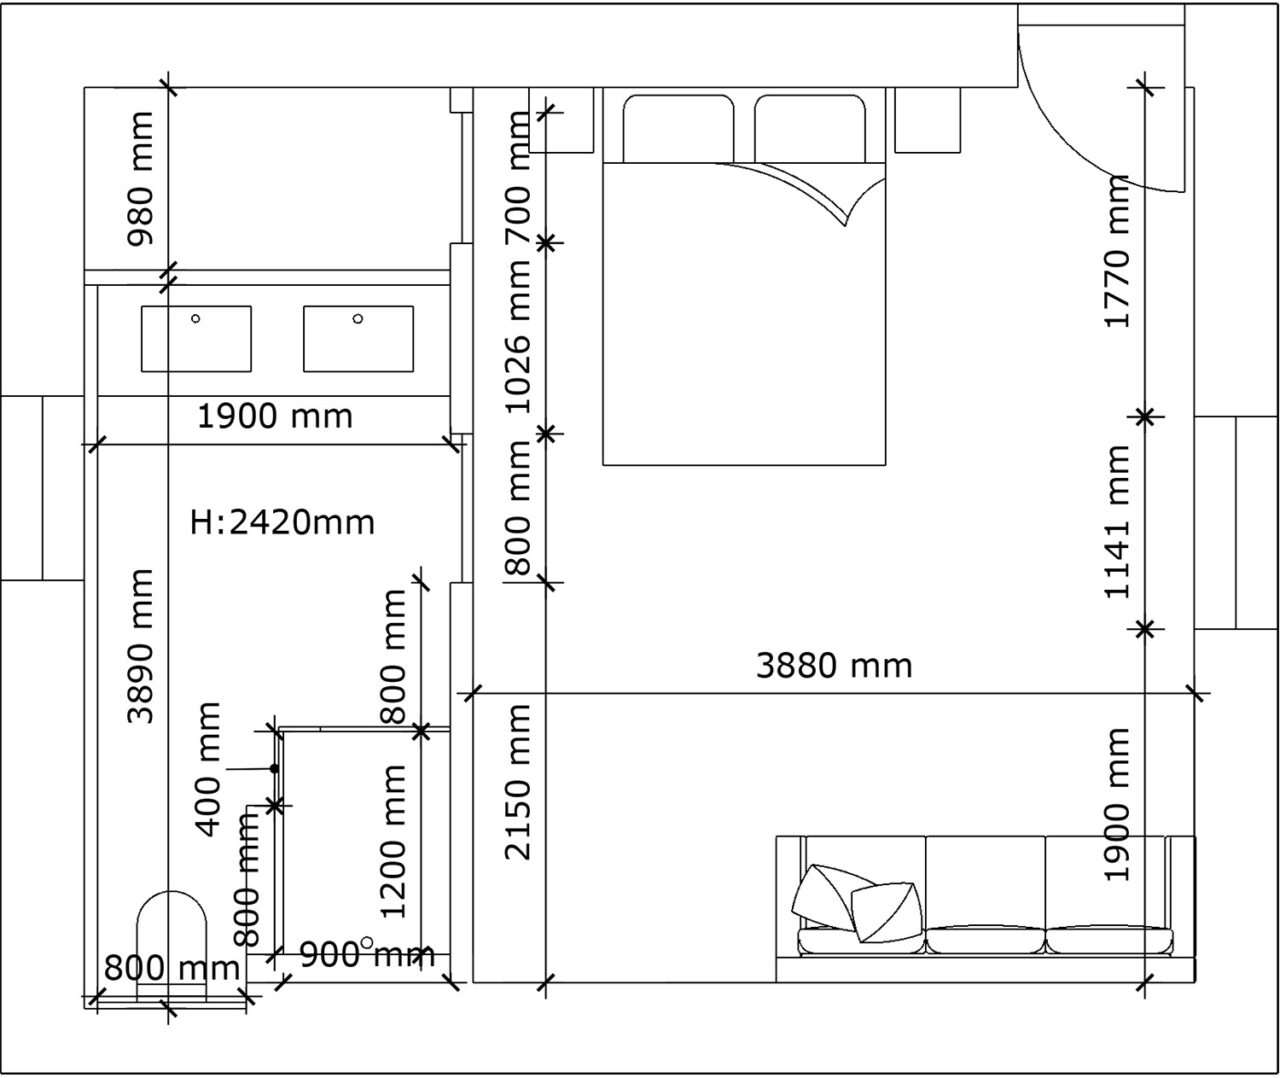
The plan below shows the 2D drawing I produced for the clients to propose the new room configuration which moved the en-suite to along the window wall and incorporating a small dressing area at the end of the space.

Plan of the new room layout with measurements.

Spacial planning – some problems along the way

To keep the new ensuite from becoming too long and too thin, I added a separate built-in closet area. This was to sit to the right of the new configuration for extra storage and a walk-in closet. Of course, there were some difficult elements along the way. This happens with a lot of projects carried out in older buildings and often requires a rethink to make the new configurations work. For example on this project, an old fuse box was awkwardly mounted on the wall inside the existing toilet. This was unsightly and required a box to be built to cover it. The floor and ceiling also needed extensive repairs where the old partition wall once stood. However, after discussing these issues with our craftsmen, I quickly found simple and effective solutions.

Important to remember

Communication is of upmost importance when carrying out a project from design stage to completion. It essential to explain the vision of the client to the artisans through the plans and renders we create. It is also invaluable to draw on the expertise and knowledge of well seasoned tradespeople so that troubleshooting can be done effectively.

Creating a technical plan

Additional plumbing and electrical work also needed to be completed. This entailed the addition and updating of light switches and sockets. An existing radiator also needed to be moved and was replaced with a heated towel rail. I then developed an electrical and plumbing plan to help the tradesman understand the agreed upon requirements.

A complete set of floor plans and 3D renderings of the space were also provided to each tradesman involved in the renovation process, namely the builder, electrician and plumber. This makes it easy for everyone to follow and sets a clear time frame to work from.

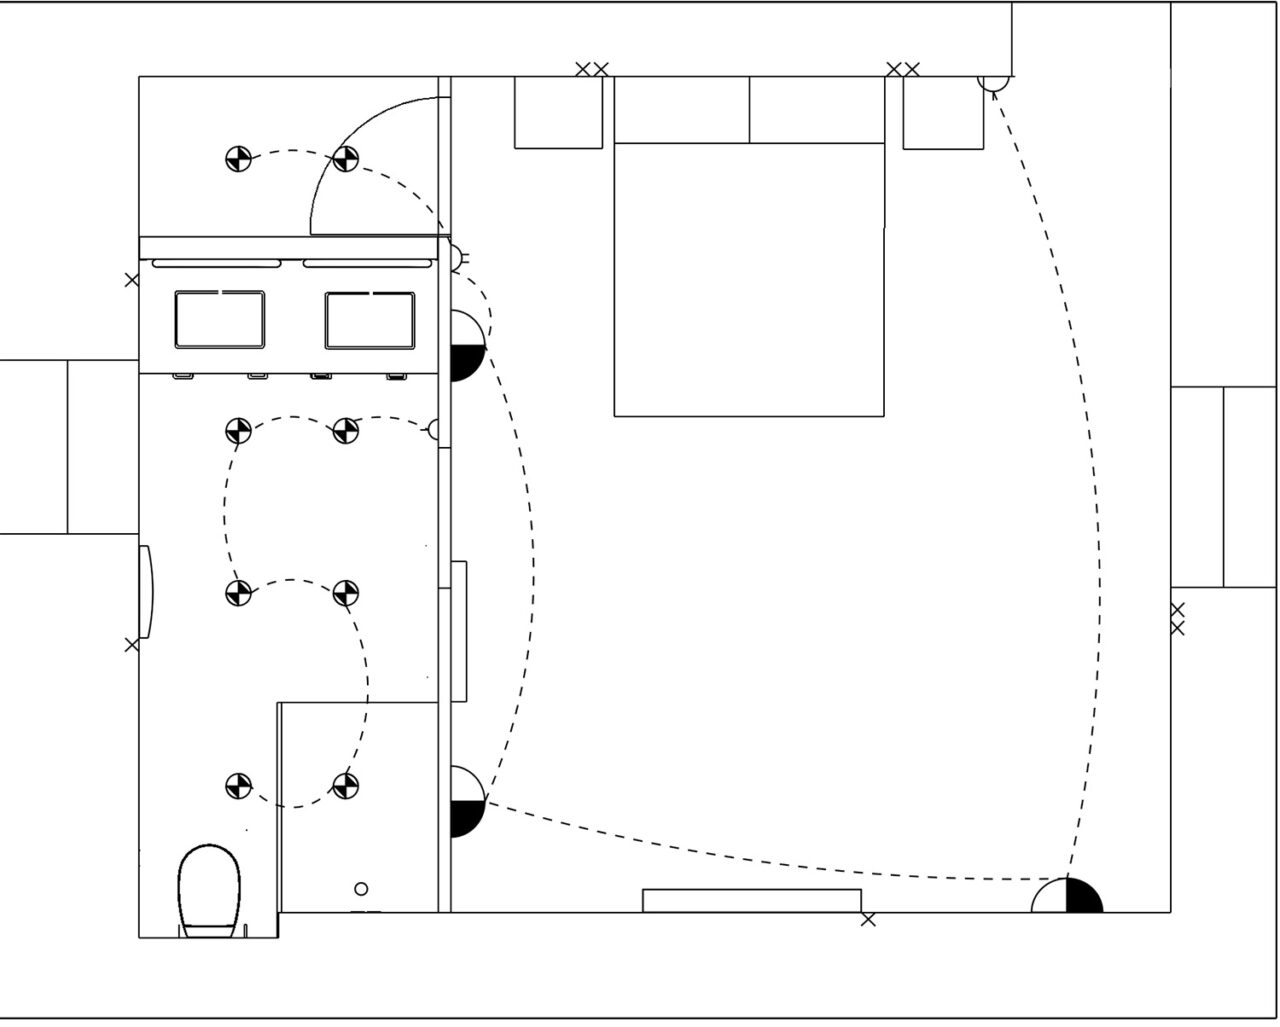
The 2D CAD drawing below shows the electrical plan given to the artisan onsite to follow when rewiring the room. I had to bear in mind the practicalities required by guests staying in the Blue room, including the addition of double sockets to each side of the bed, wall lights around the room to create a more subtle and ambient lighting and the new ceiling spotlights required in the en-suite bathroom and new dressing area.

Electrical floor plan showing where the new lighting well be situated.

Top tip:

I found it handy to have a copy of the A3 plan on hand when we had mid-project meetings so we could make comments/changes as needed and then distribute the updates to everyone involved. After the client approves the layout, I usually provide a 3D rendered image as shown above. This helps to visualise the project on a global scale and allows artisans to evaluate the spatial planning of the space.

Interior decoration: Sourcing

After submitting the completed interior design project to the craftsman and beginning the fit-out work, the next task was to source decorative elements. Tiles, fixtures and fittings and furniture for the en suite and bedroom were sourced from various suppliers. These choices are made in close collaboration with the clients. Maison Bretagne’s extensive database of suppliers enables our team to source similar, if not exact products required.

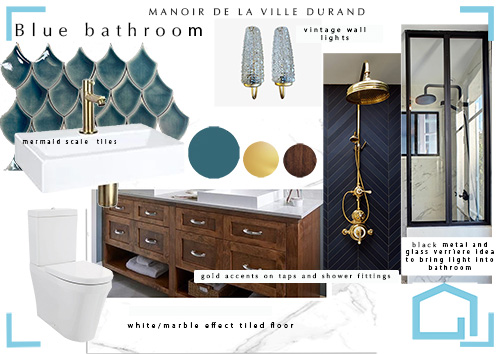
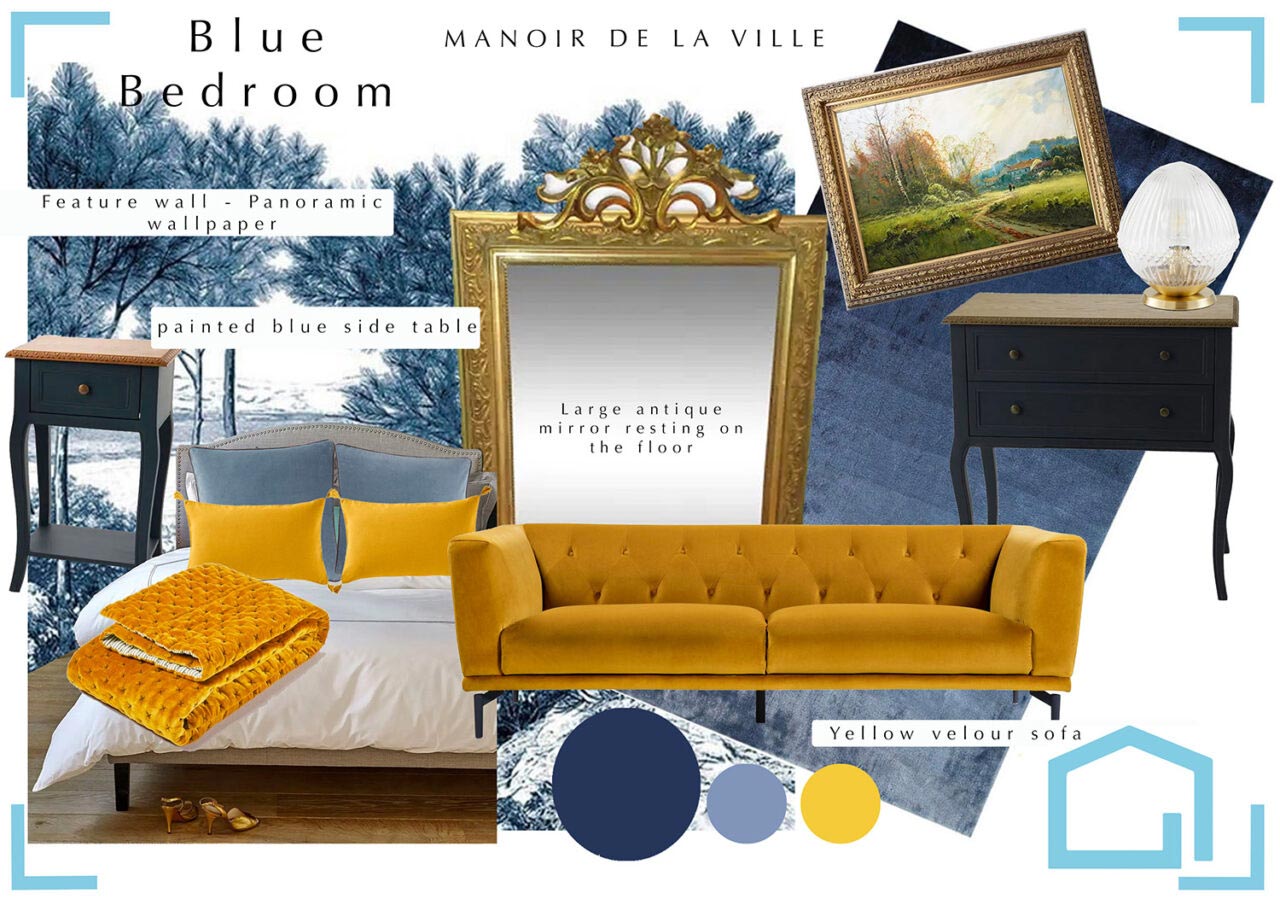
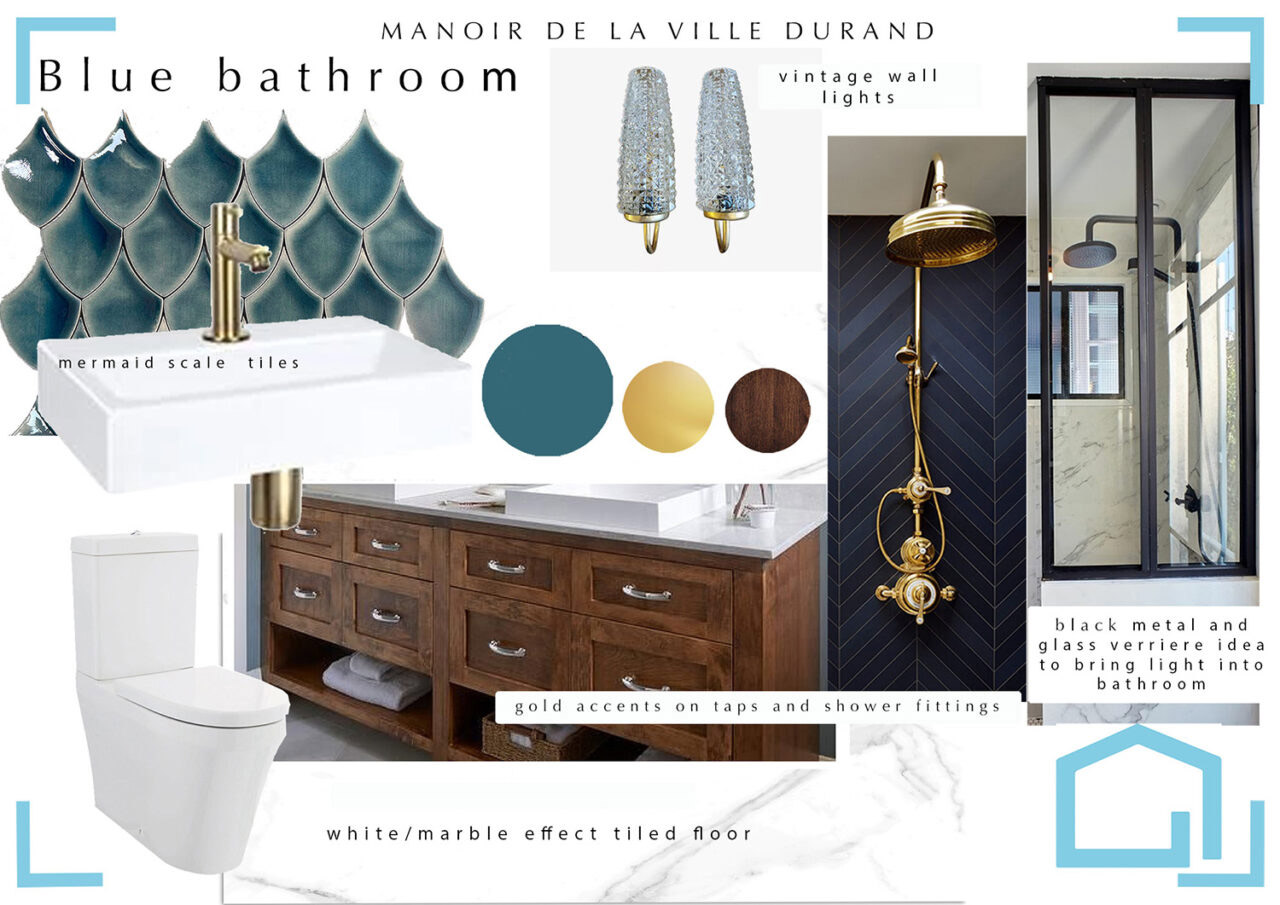
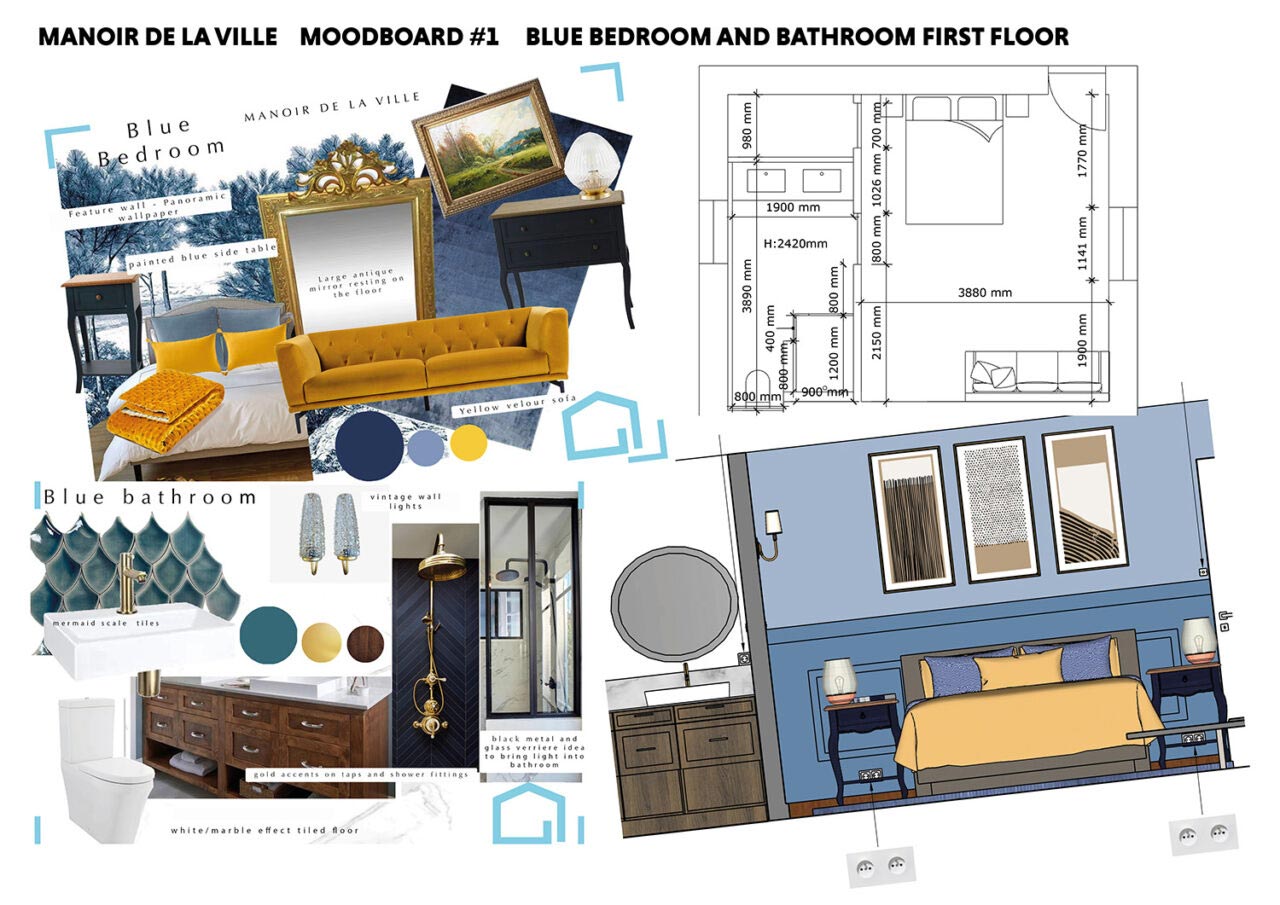
The mood boards shown below were produced for the clients following our research into the products we proposed to be sourced for the project. We provided these visual designs together with a complete shopping list showing the details and cost of each product. The client was then able to confirm or request changes to be made to certain elements so that they could get the exact look they wanted for the newly designed space.

Mood board for the bedroom, showing the main colours picked which are blue, light blue and yellow.
Ensuite moodboard keeping the same colours picked out. With blue tiles picked.
A combination of the moodboards and plans

Details of elements sourced for the client:

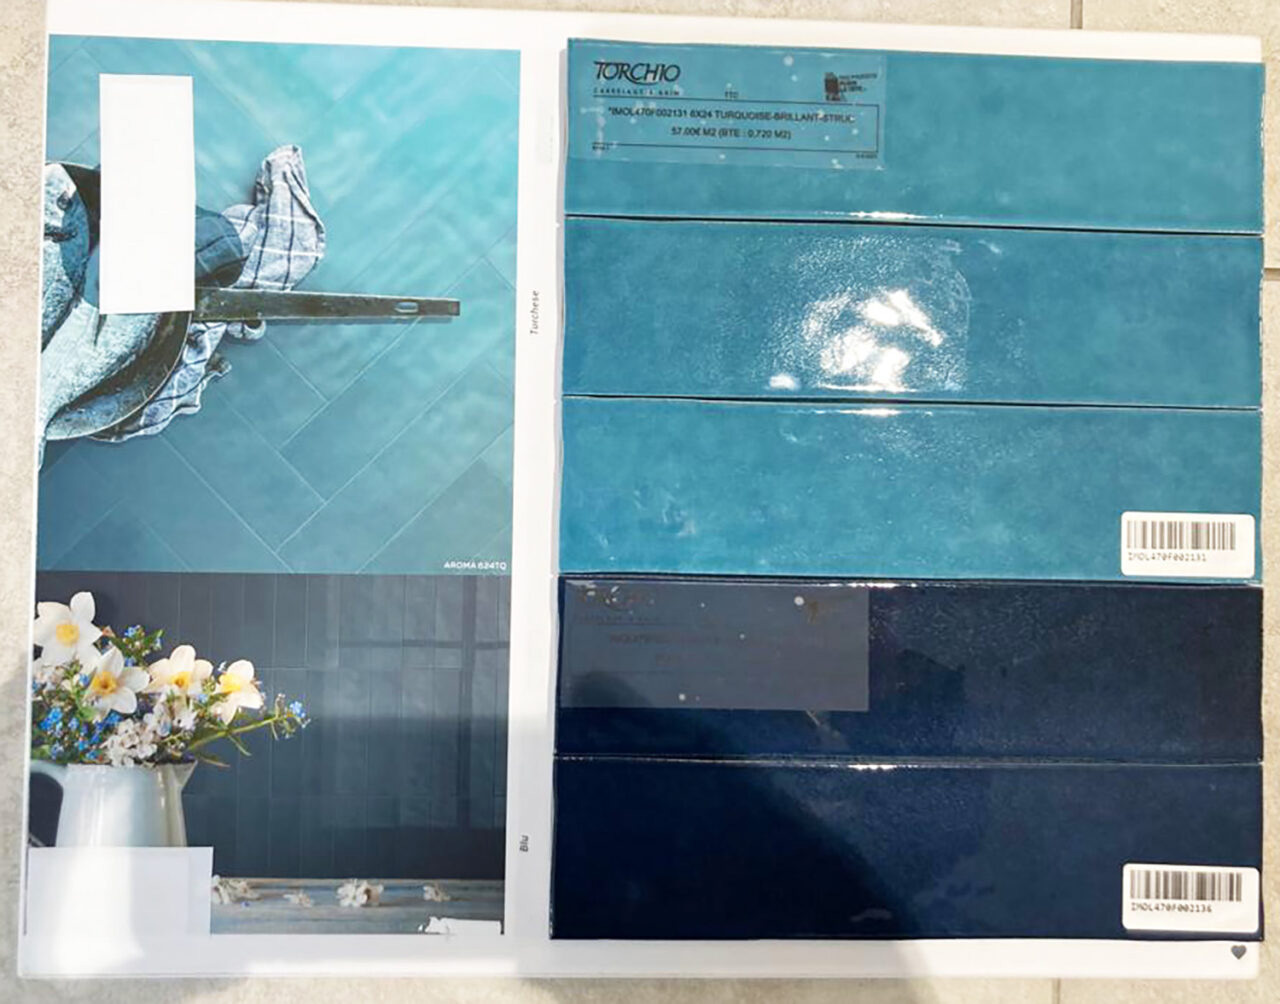
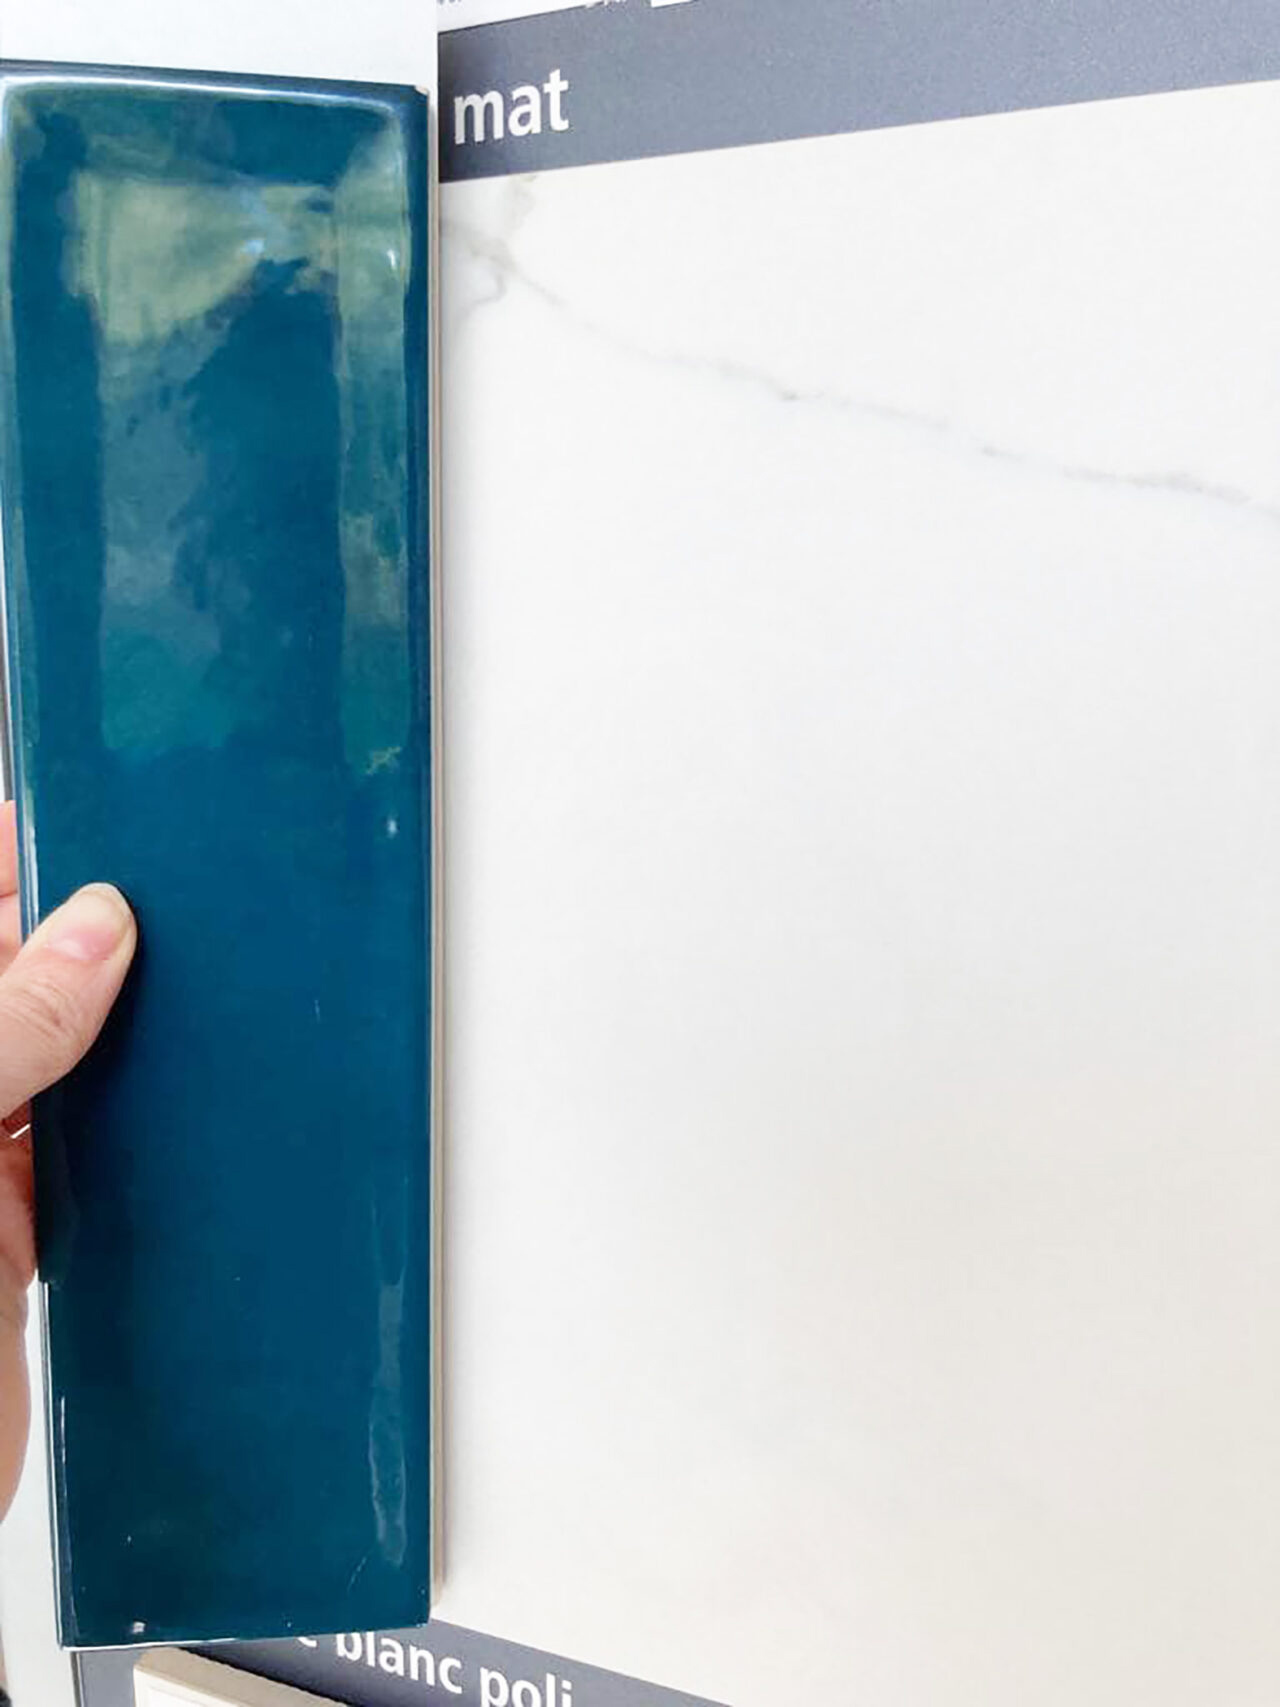
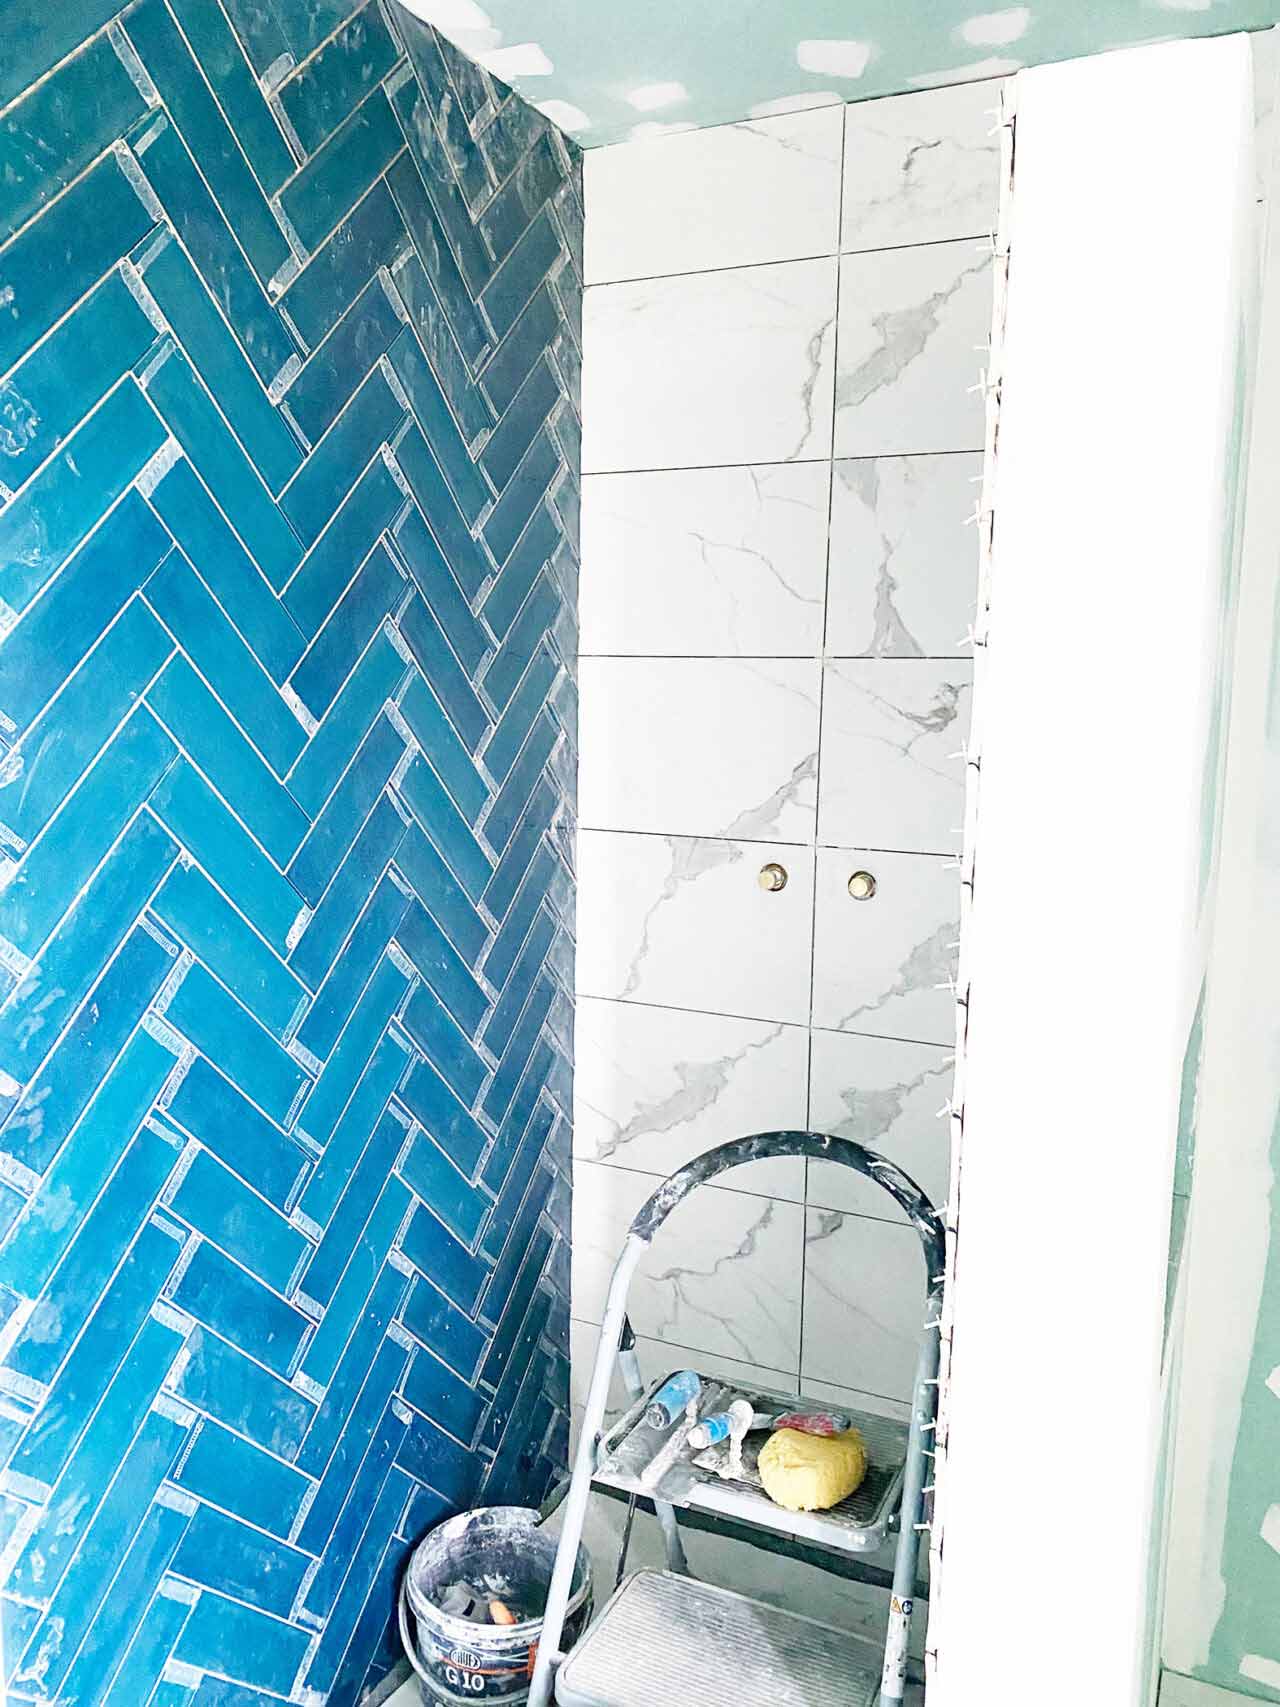
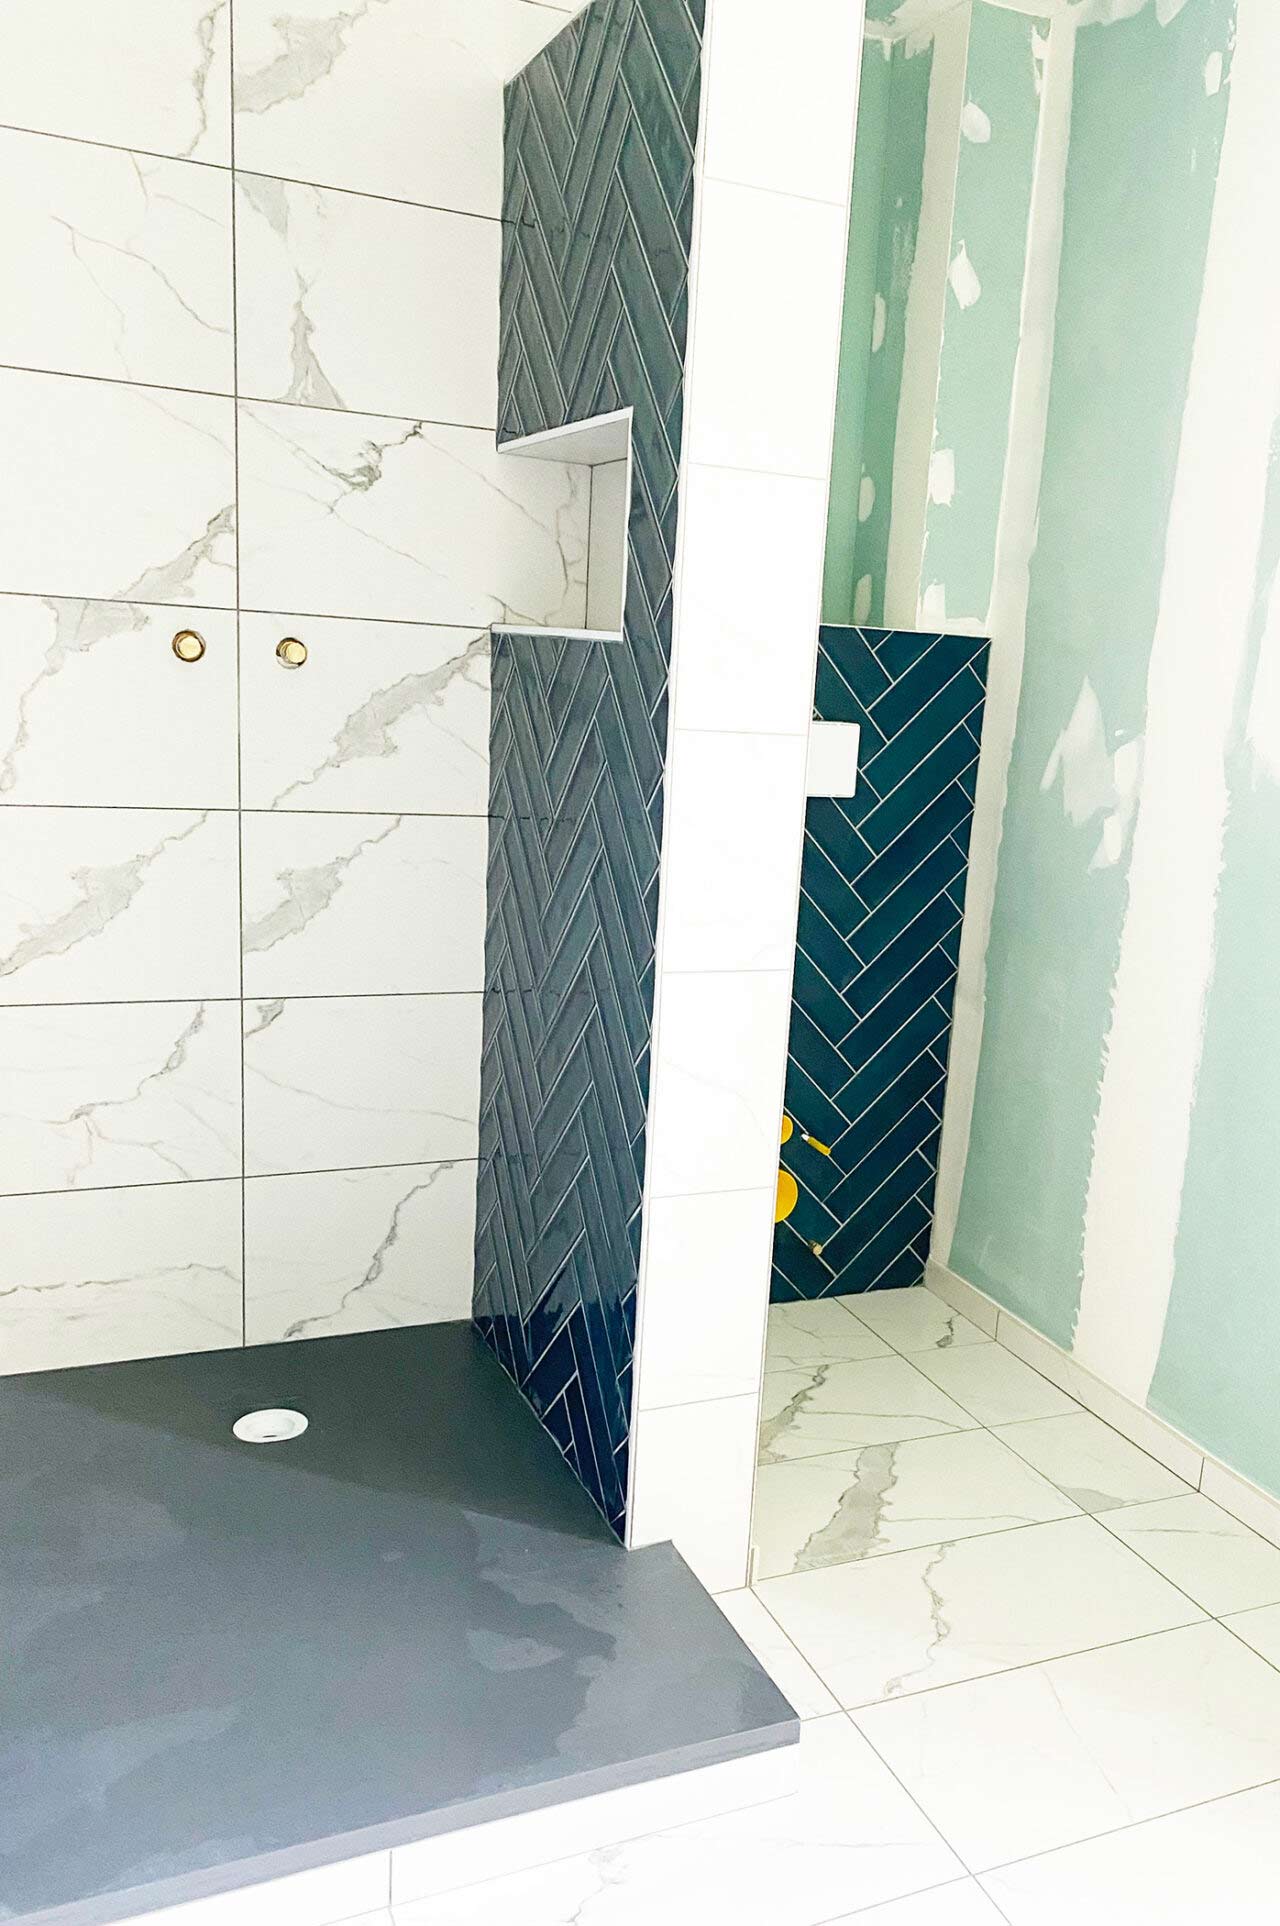
The photos below are of some of the elements we sourced for this project. The client specified that they would lie a herringbone pattern created on the shower cubicle wall with the tiles used and they also loved the dark blue colour I had proposed in my designs. We managed to source these from TORCHIO .

The marble effect floor tiles which were 60×60 (cm) in dimension were sourced from the showroom of Point P Plancoet

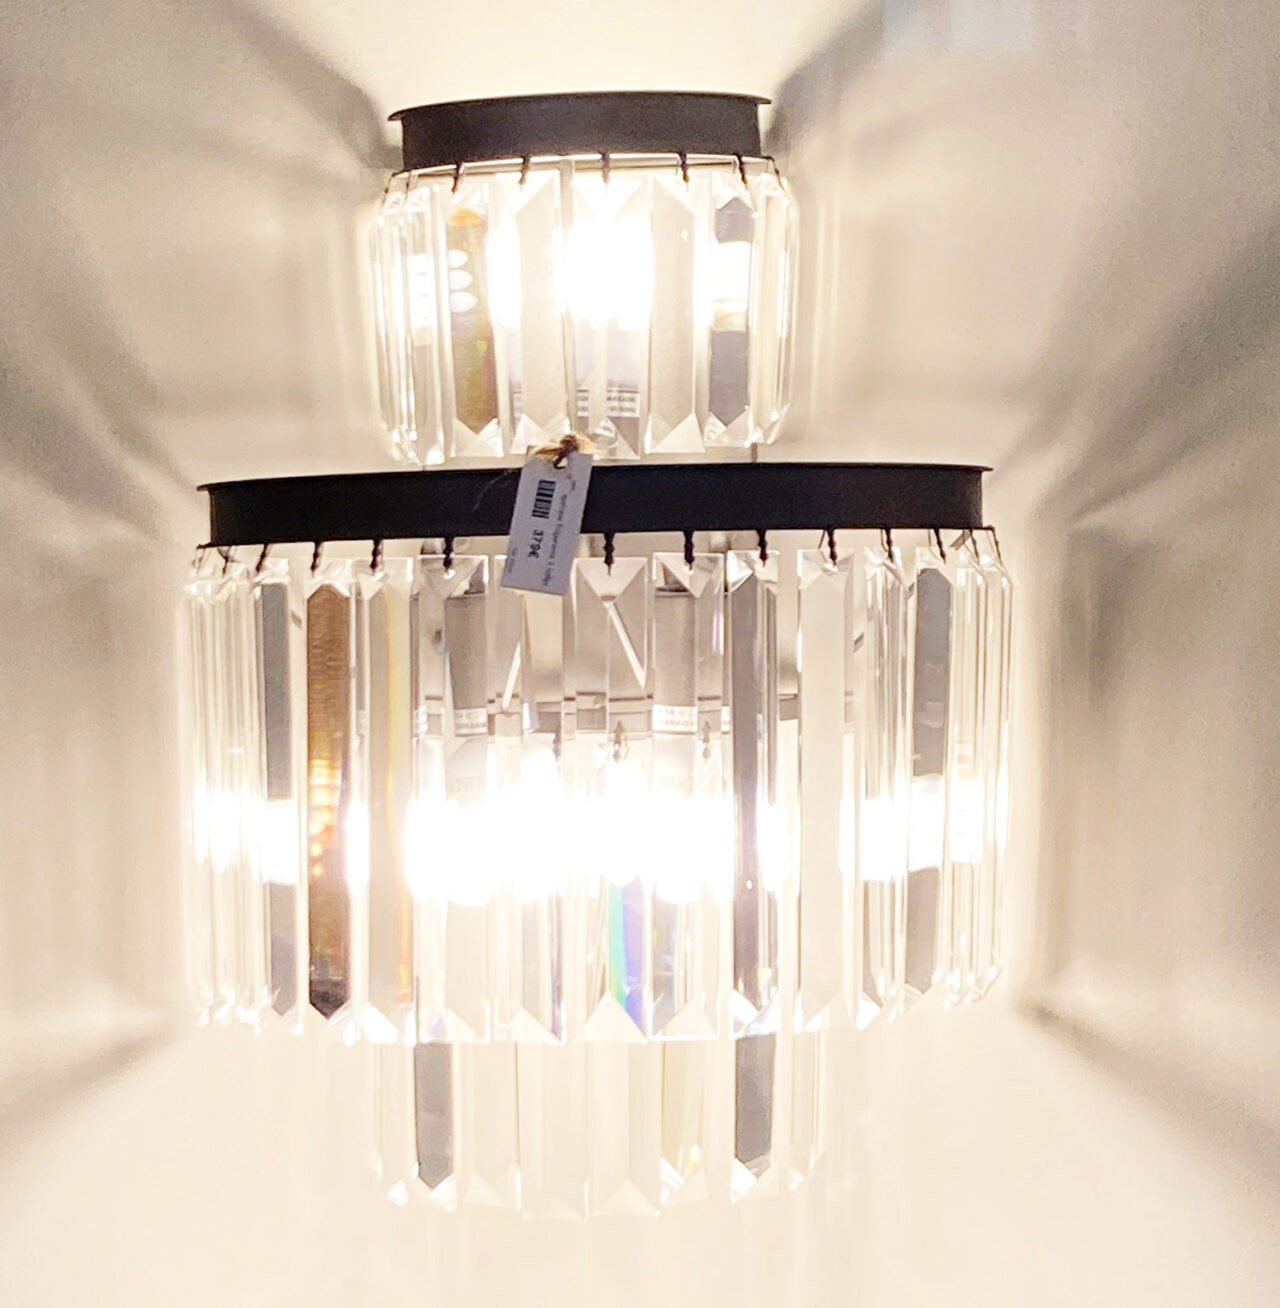
In addition the glamorous wall lights were sourced from the interiors store Album Famille  in St Malo.

Catalogue showing the blue tiles are team showed to the client
Wall light, with hanging crystals going over three half circles.

Project management

Throughout the project I was in regular contact with the client via Skype, as they were in the US. I and others on the team also regularly communicated with the various artisans on site. This way the design was adhered to as closely as possible. This process is necessary to ensure that the desired appearance of the finished room is achieved. It also means that the work runs more smoothly and is effectuated within the required time frame.

As the work developed I took photos of each stage to send to the client in report form. This is particularly important when a client is not onsite. So that they can be actively involved and informed about the project the creation of this visual report is key.

Ultimately, with good organisation and quality craftsmanship from the artisans, the works were achieved. There was a good coherence with the initial designs and the clients were delivered the new bedroom and en-suite they wanted.

If you would like to learn more about our interior design services, follow this link:Design

The below photos show the work in progress in the en-suite area

Tiling around the shower, blue tiles and marble tiles have been used
bathroom tiling around shower and toilet area

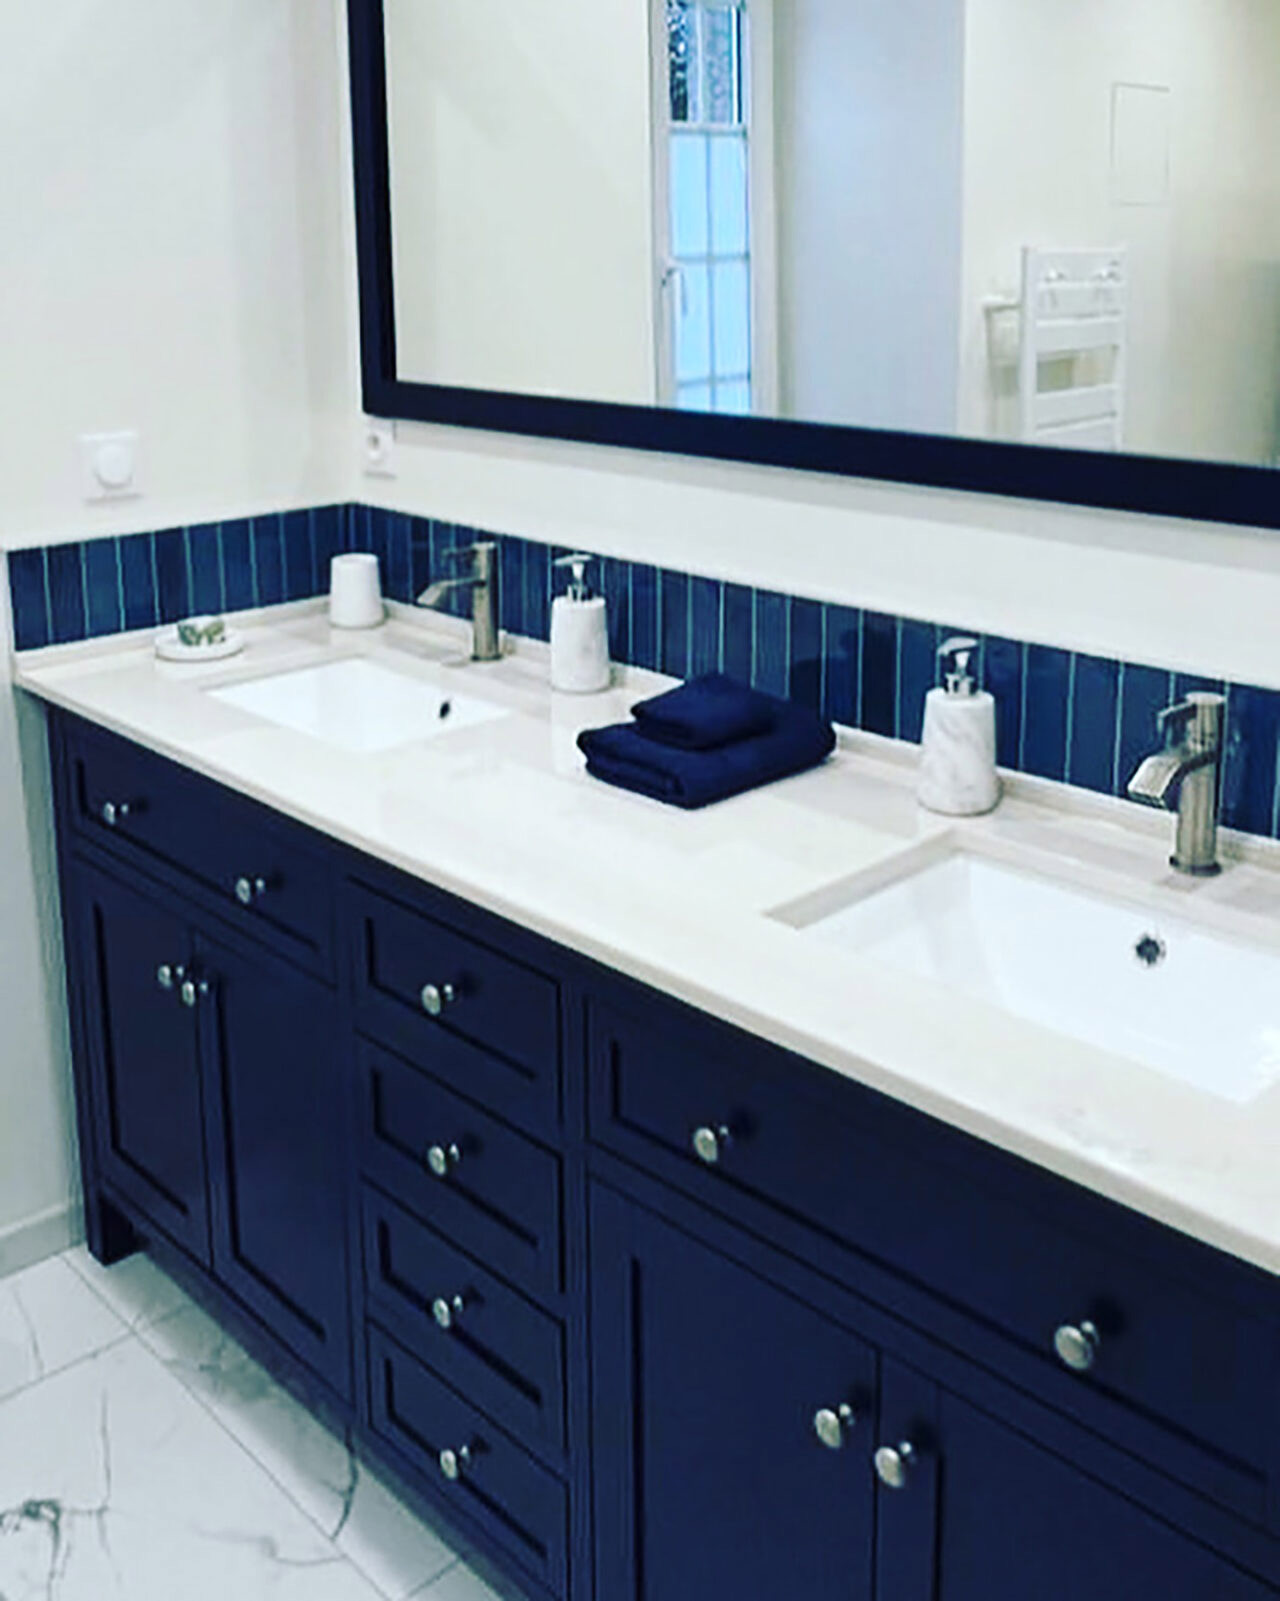
Photo of the finished en-suite area with the tiles and the bathroom furniture we sourced for the client in-situ.

New sink fitted into place under a large mirror

From azgrety in DESIGN

Share it on

Newletter

Good things come to those who subscribe

We use cookies to ensure that we give you the best experience on our website. If you continue to use this site we will assume that you are happy with it En savoir plus